HubSpot is an incredibly powerful platform for marketers and developers, offering the ability to create custom modules for templates that streamline workflows and enhance flexibility. But how exactly do you go about building one? This guide will walk you through the process in detail.
What Is a HubSpot Module?
A HubSpot module is a reusable block of code or functionality that can be dragged and dropped into templates or pages within the HubSpot CMS. Modules allow developers and marketers to create dynamic, editable content elements like forms, sliders, or FAQ sections without needing to edit the template’s core code.
Think of it as a building block for your website that simplifies customization and reduces repetitive tasks.
Why Should You Create a Custom HubSpot Module?
Creating a custom HubSpot module allows you to:
- Streamline page building by reusing content blocks.
- Provide marketers with easy-to-use, customizable elements.
- Reduce dependency on developers for simple updates.
- Improve scalability and consistency across your website.
Custom modules enhance both efficiency and the user experience, making them an essential tool for websites on the HubSpot CMS.
Where Can You Start Building a HubSpot Module?
The journey to creating a module begins in the HubSpot Design Manager. To access it:
- Log in to your HubSpot account.
- Navigate to Marketing > Files and Templates > Design Tools.
The Design Manager is your workspace for creating, editing, and organizing all design assets, including templates, modules, and stylesheets.
How Do You Create a New Module?
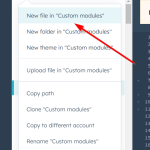
- Once you’re in the Design Manager, click the File menu.
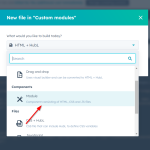
- Select New File and choose the type of file you want to create.
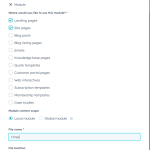
- Click on Module to begin. You’ll have the option to create:
- Custom Modules for specific templates or pages.
- Global Modules for reusable components across multiple templates.
- Name your module clearly and save it in an appropriate folder for easy organization.
Now, you’re ready to start adding functionality.
What Fields Can You Add to Your Module?
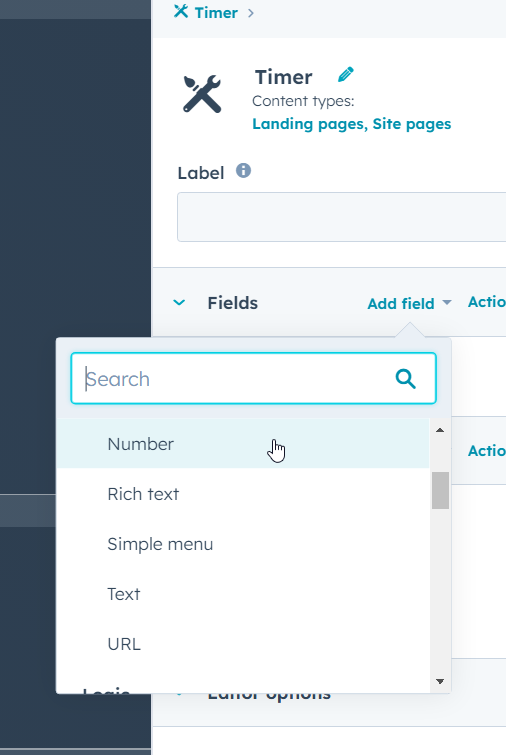
Fields are the editable components of your module that content editors can customize. Adding fields to your module is simple and makes it flexible for various use cases.
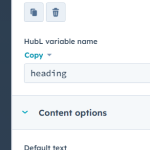
- Text Fields: Let users add simple text like titles or descriptions. For example, a “Heading” field where users type the main heading for a section.
- Image Uploads: Allow users to add images. For example, a “Background Image” field to customize visuals.
- Rich Text Fields: Provide a space for formatted text like paragraphs with styling options.
- Repeaters: Create lists or multiple entries, such as FAQs or team member sections. Each entry can have its own text, image, or other fields.
- Boolean (Checkboxes): Let users toggle features on or off, like “Show Button” or “Enable Animation.”
How to Add a Field:
- Drag and drop the field type you need from the Inspector Panel on the right side of the editor into the module area.
- Configure the settings for the field:
- Label: Name the field (e.g., “Main Heading”).
- Placeholder: Add sample text to guide editors.
- Default Value: Prepopulate the field with common content to save time.
For example, a text field for a “Main Heading” could have the label “Main Heading” and placeholder text like “Enter your section title here.”
How Do You Customize the Module with Code?
Customizing your module involves using HubSpot’s HUBL (HubSpot Markup Language). Here’s an example:
module.html
<div class="custom-module">
  <h1>{{ module.heading }}</h1>
  <div id="countdown-timer" data-countdown="{{ module.countdown_from }}">
</div>
</div>
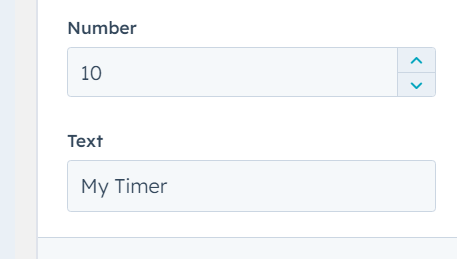
This snippet uses placeholders for the heading and a dynamic countdown timer. When someone edits the module in the HubSpot CMS, they’ll see these fields and be able to customize the content.
How Do You Style the Module?
Styling your module ensures it looks great on your website. To do this:
- Create a linked CSS file or add inline styles.
- Use responsive design principles for mobile-friendliness.
For example, a simple CSS file might include:
module.css
#timer {
    font-size: 48px;
    font-weight: bold;
    text-align: center;
    color: #333;
    margin: 20px 0;
}
Link this CSS file to your module in the Linked Files section of the Design Manager.
JavaScript Code to Show Timer
module.js
document.addEventListener('DOMContentLoaded', () => {
    const countdownElement = document.getElementById('countdown-timer');
    const countdownFrom = countdownElement.getAttribute('data-countdown');
    window.countdownFrom = countdownFrom;
    console.log(`Countdown starts from: ${countdownFrom}`);


    let countdownValue = parseInt(window.countdownFrom, 10) || 10; // Default to 10 if undefined
   // const countdownElement = document.getElementById('countdown-timer');

    const timer = setInterval(() => {
        countdownElement.textContent = countdownValue;
        if (countdownValue <= 0) {
            clearInterval(timer);
            countdownElement.textContent = "Time's up!";
        }
        countdownValue--;
    }, 1000);


});
This script retrieves the countdown value from a data-countdown attribute and updates the displayed timer in real time. It defaults to 10 seconds if no value is provided.
How Do You Test and Preview Your Module?
Testing is crucial to ensure your module works as expected. HubSpot provides built-in preview tools:
- Click Preview in the module editor to see how your module looks with sample content.
- Test it with real content by adding it to a test page or template.
Check responsiveness on different screen sizes to verify that the module adapts well to desktops, tablets, and mobile devices.
How Do You Add Your Module to a Template?
- Open the template where you want to include your module in the Design Manager.
- Drag your module from the left panel into the desired section of the template.
- Save and publish the template.
Once added, your module is ready for use on any page built with that template.


